 View on GitHub
 Testing Reference
Testing
Gini Pay Deep Link For Your App
In order for banking apps to be able to return the user to your app after the payment has been resolved you need register a scheme for your app to respond to a deep link scheme known by the Gini Bank API.
Info: You should already have a scheme and host from us. Please contact us in case you don’t have them.
The following is an example for the deep link gini-pay://payment-requester:

Testing
An example banking app is available in the Gini Mobile Monorepo iOS repository.
In order to test using our example banking app you need to use development client credentials. This will make sure the Gini Health SDK uses a test payment provider which will open our example banking app. To inject your API credentials into the Bank example app you need to fill in your credentials in Credentials.plist.
End to end testing
The app scheme in our banking example app: ginipay-bank://. Please, specify this scheme LSApplicationQueriesSchemes in your app in Info.plist file.
After you’ve set the client credentials in the example banking app and installed it on your device you can run your app.
Payment component
After following the integration steps above you’ll arrive at the Payment Invoice list screen, which already has integrated the Payment Component.
The following screenshot shows a sample list of invoices. Tapping on a CTA button will show the Payment Component in a bottom sheet if a payment provider isn’t selected already.
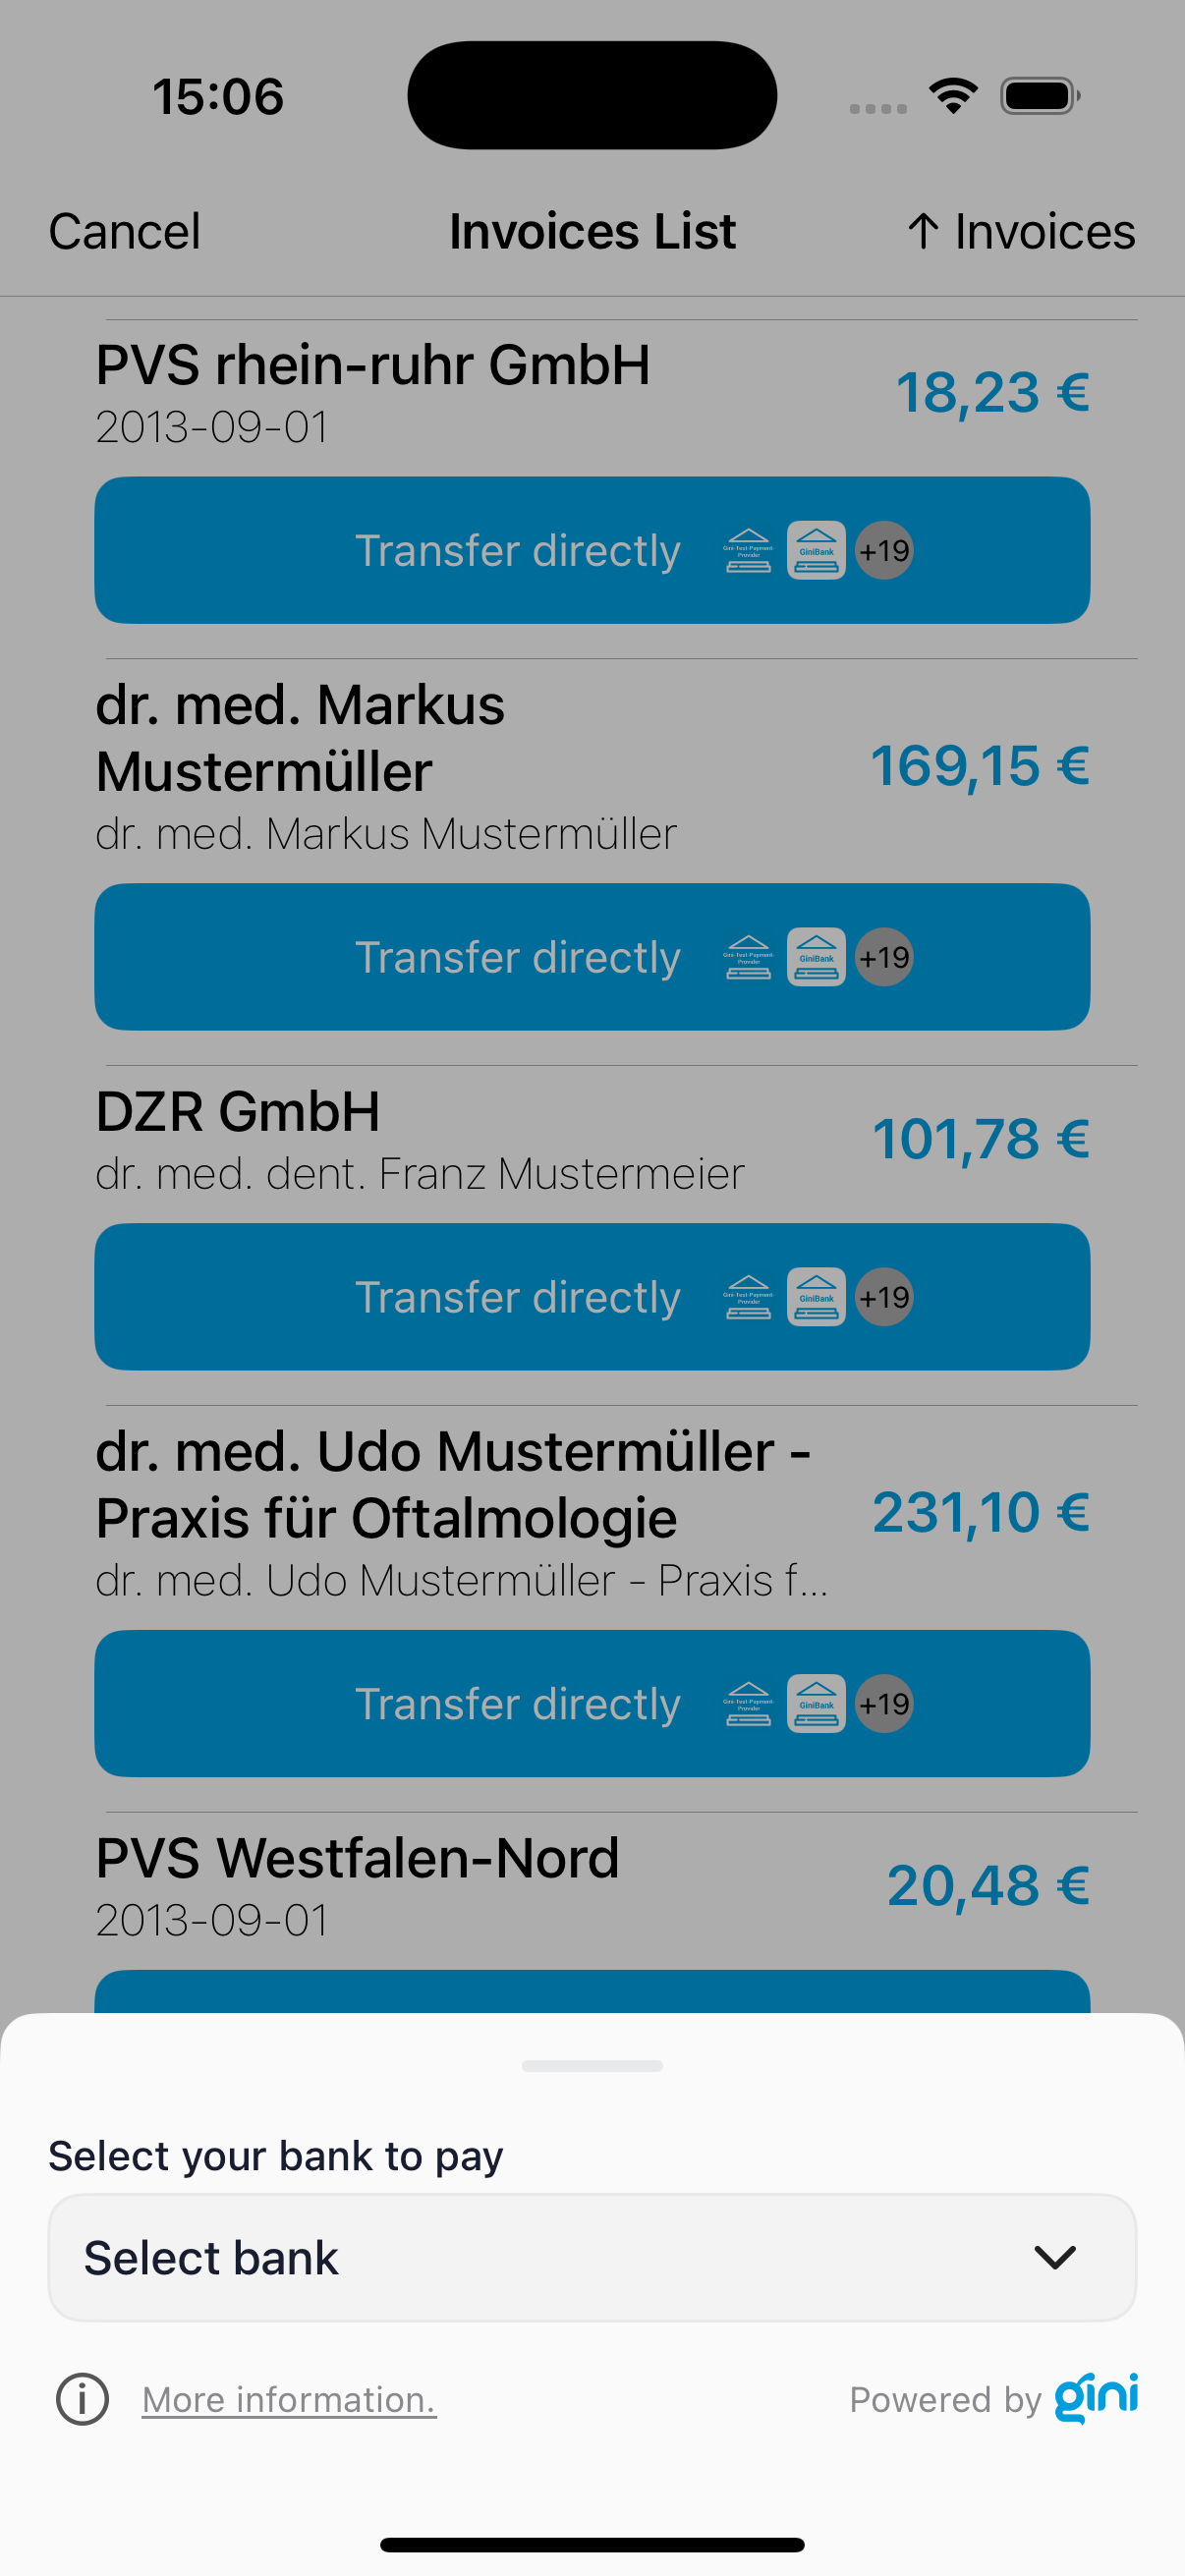
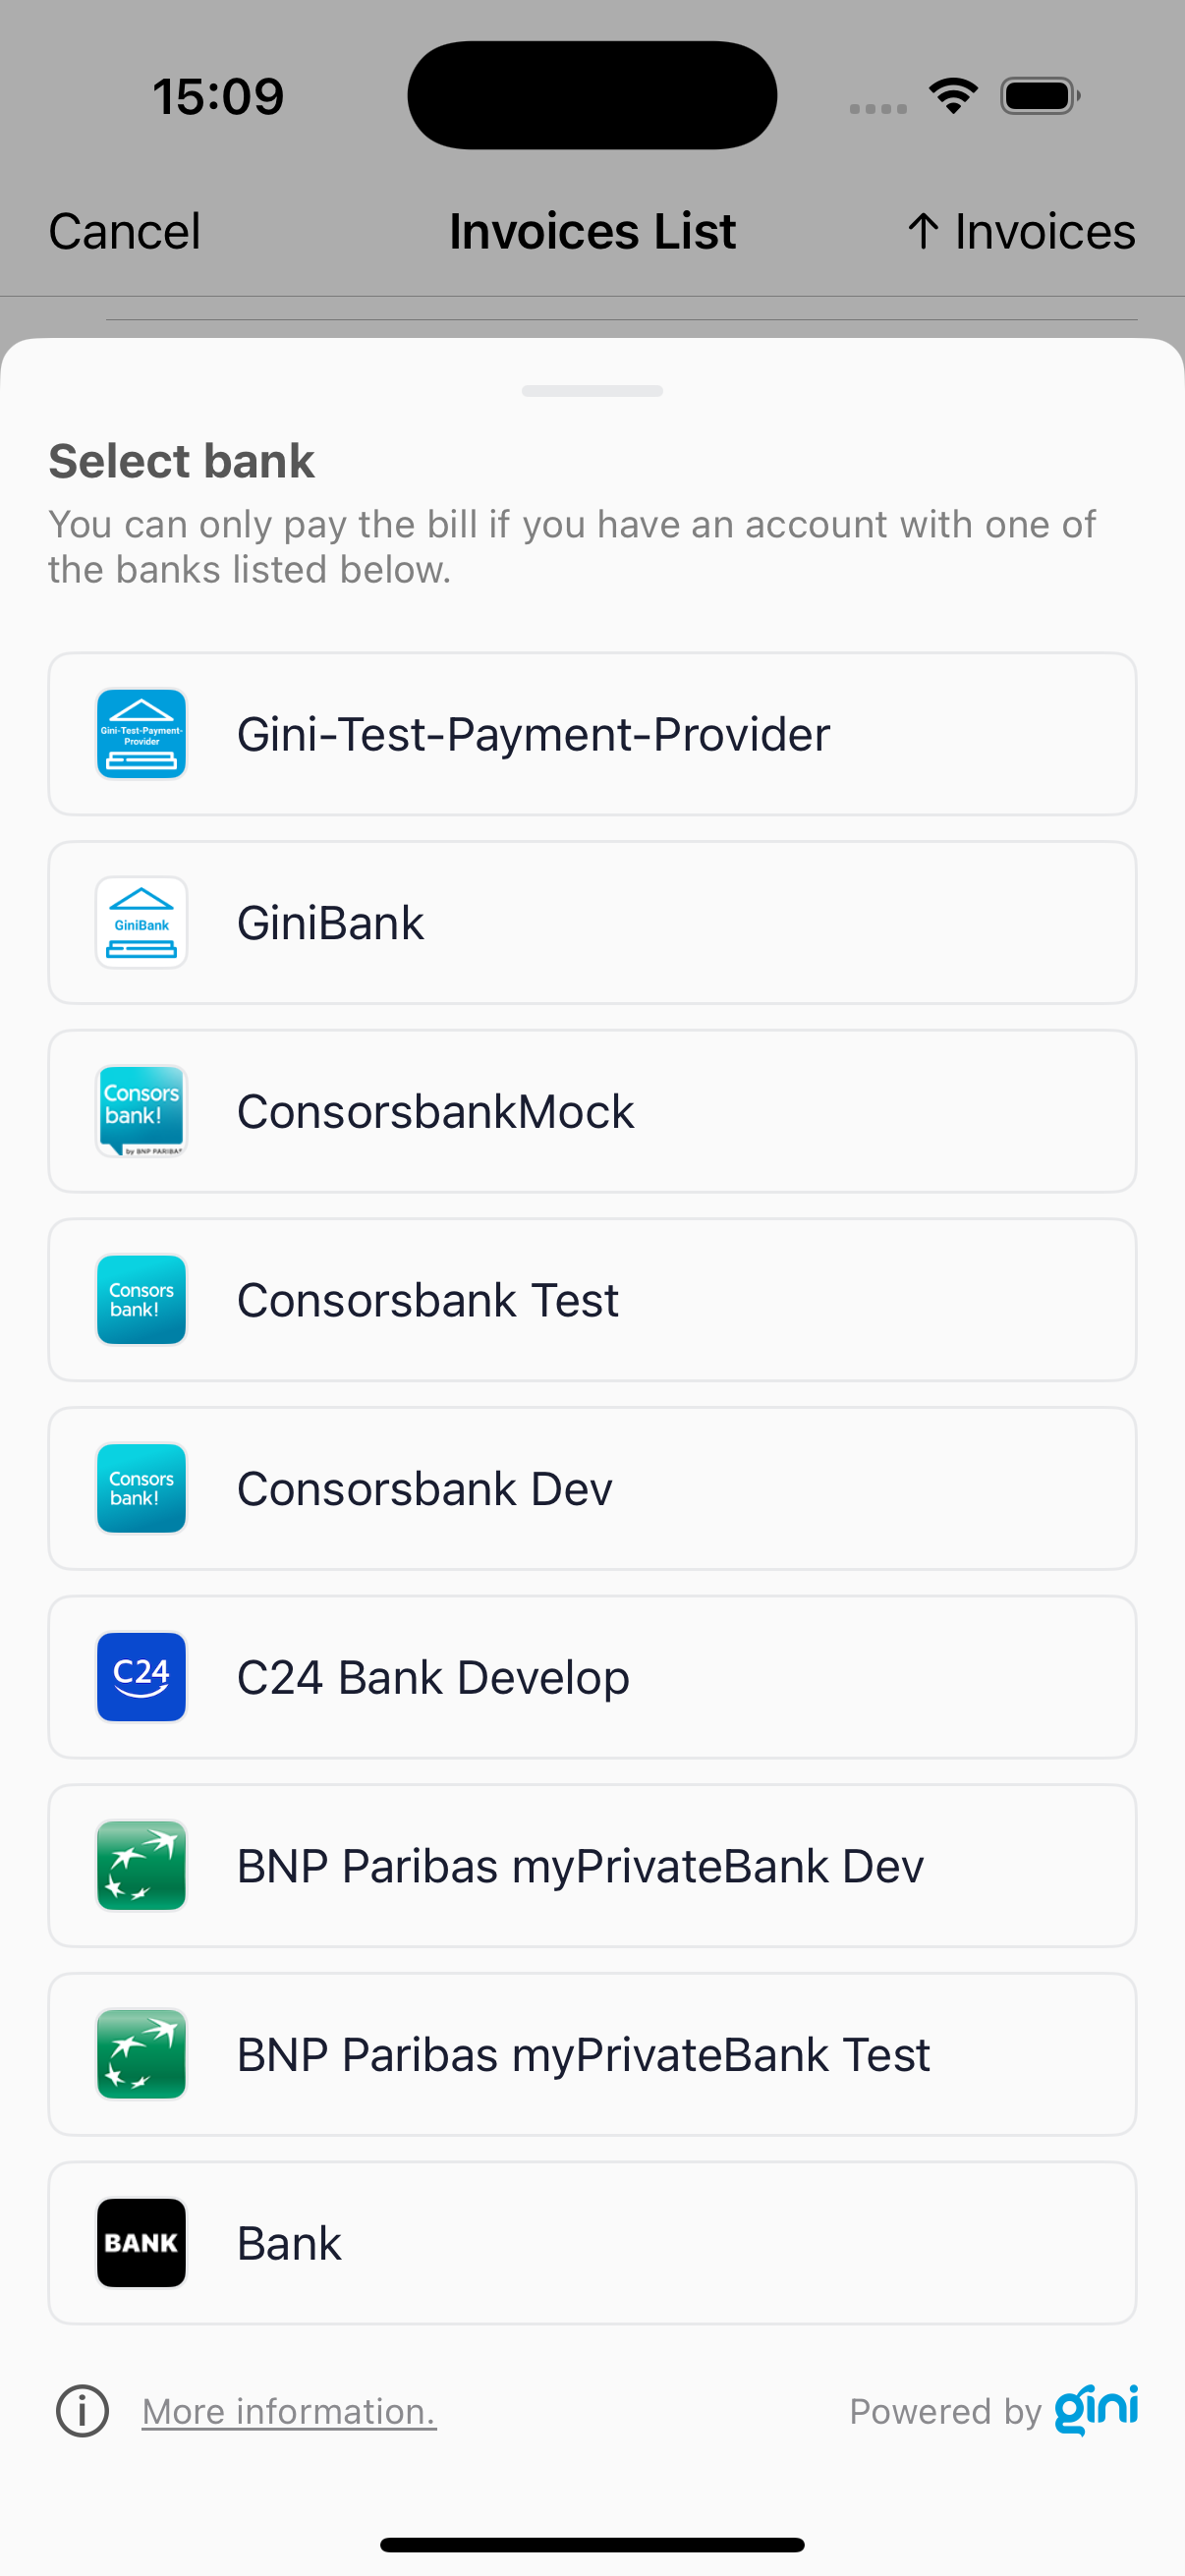
Bank Selection Bottom sheet
By clicking the picker you should see the BankSelectionBottomSheet with the list of available banking apps (including Gini-Test-Payment-Provider and other testing and production apps).
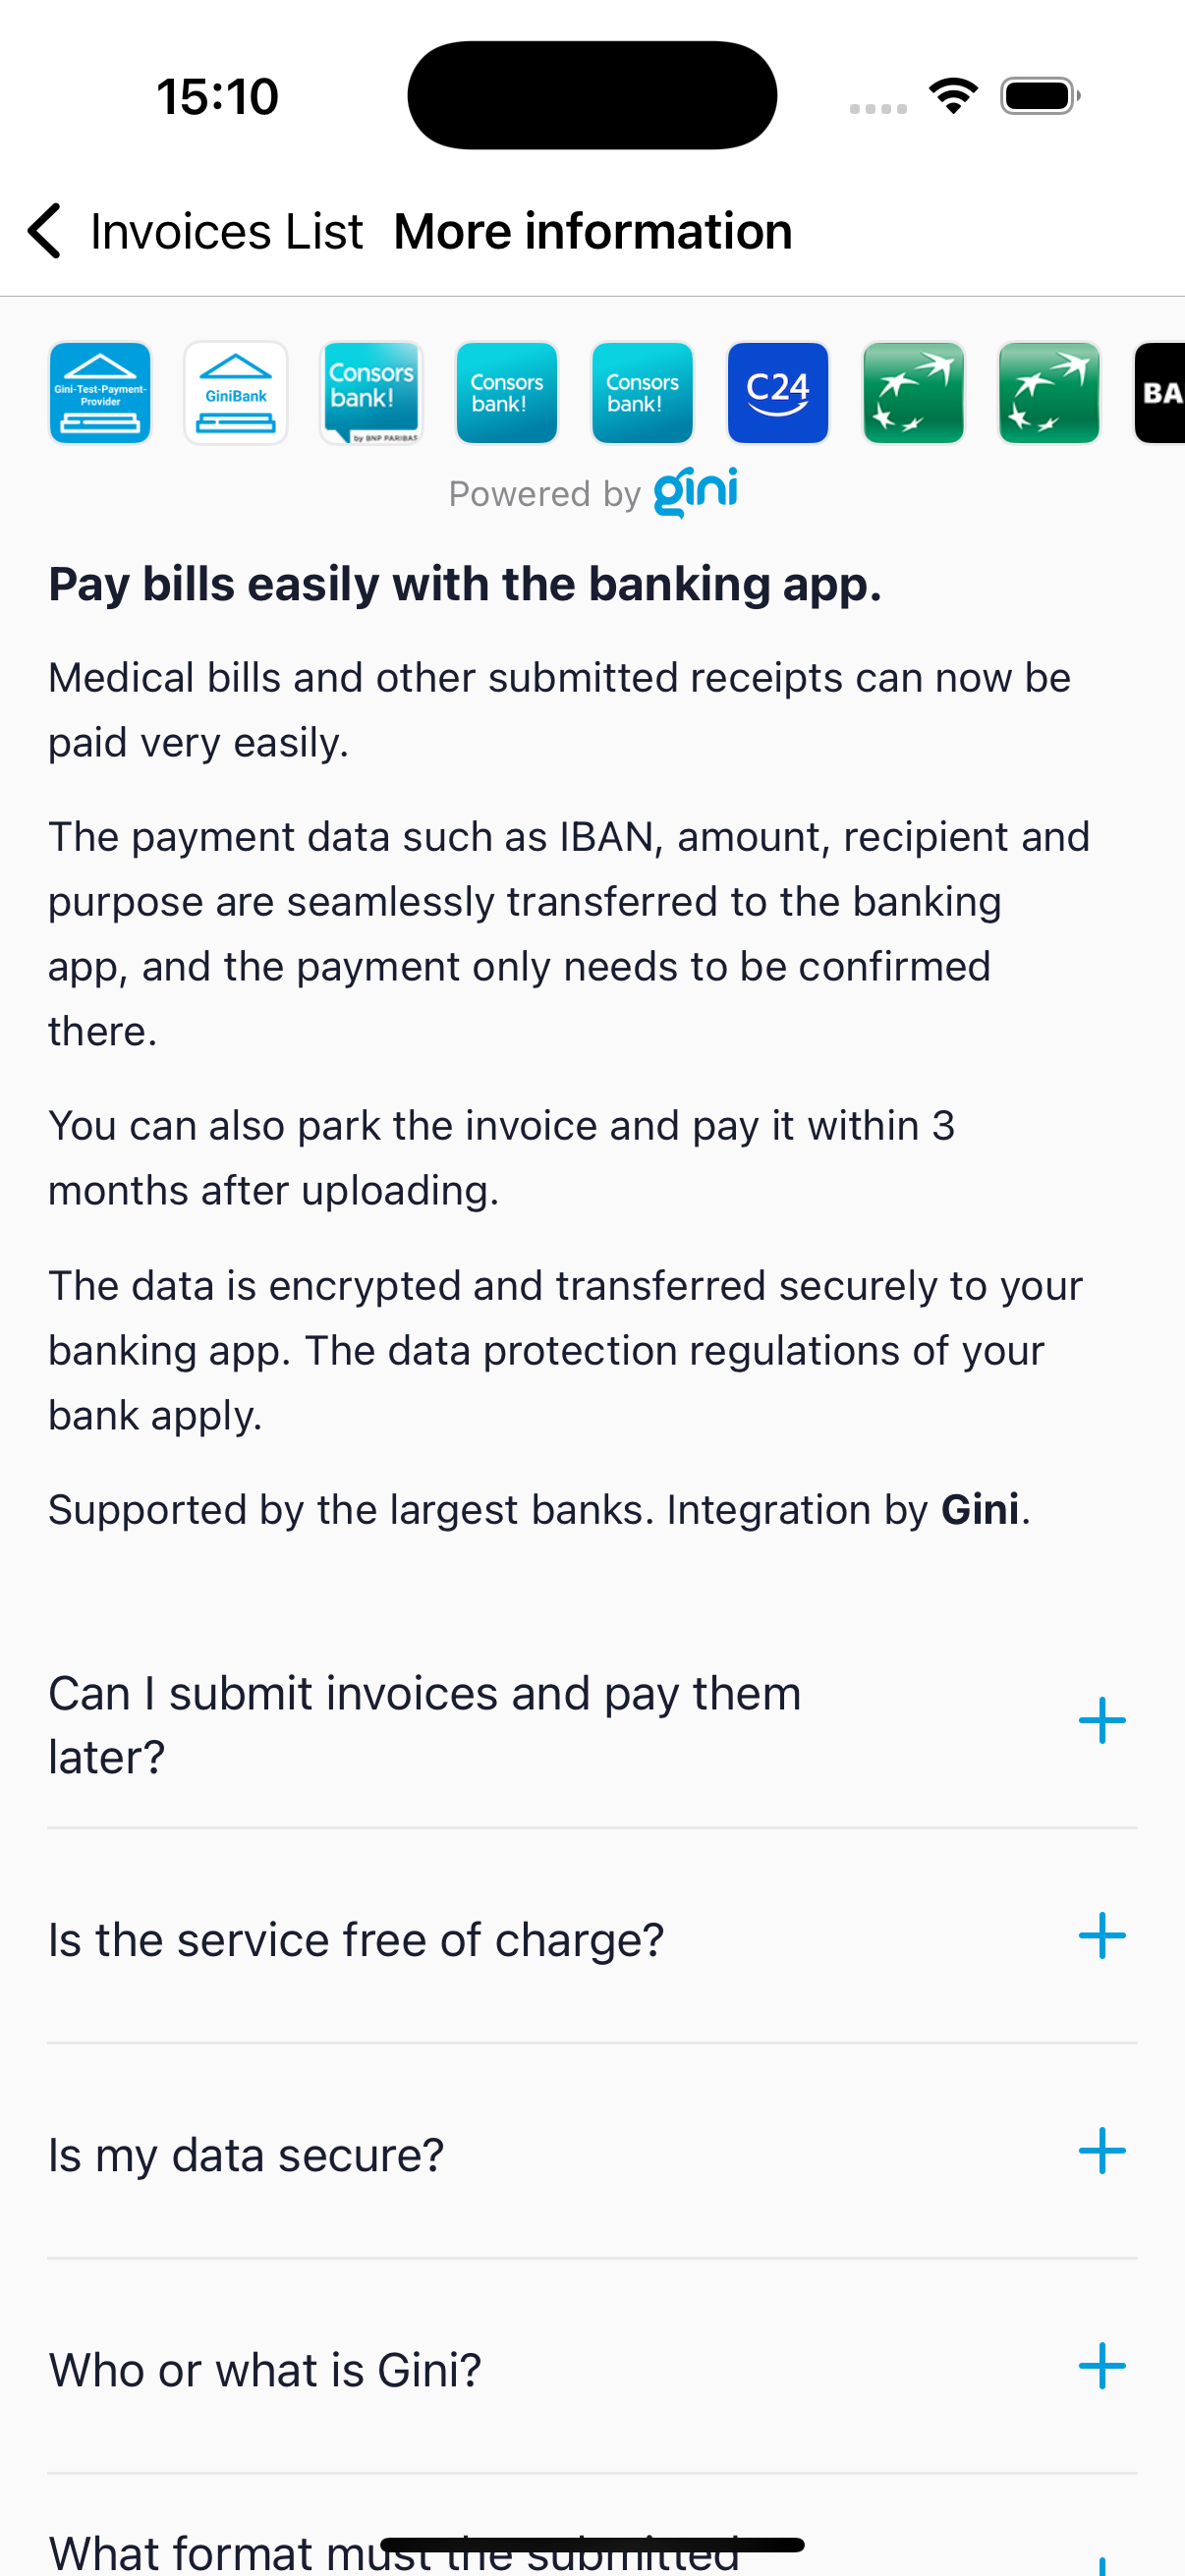
More information and FAQ
By clicking the more information in the bottom Payment Component view you should see the Payment feature Info screen with information about the payment feature and an FAQ section.
Payment Review
By clicking the Continue to overview button on a bottom Payment Component view you should see the Payment Review screen, which shows the invoice’s pages and the payment information. It also allows editing the payment information. The To the banking app button should have the colors of the banking app, which was selected in the payment component view. There should also be a bank picker with selected payment provider in the left down part of the view. You can tap on it and change the payment provider.
Check that the extractions and the document preview are shown and then press the To the banking app button:

Execute payment
When clicking the To the banking app button on the payment review you should be redirected to the example banking app where the payment information will be fetched from Gini (including any changes you made on the payment review). Press the “Pay” button to execute a test payment which will mark the payment as paid in the Gini Health API.
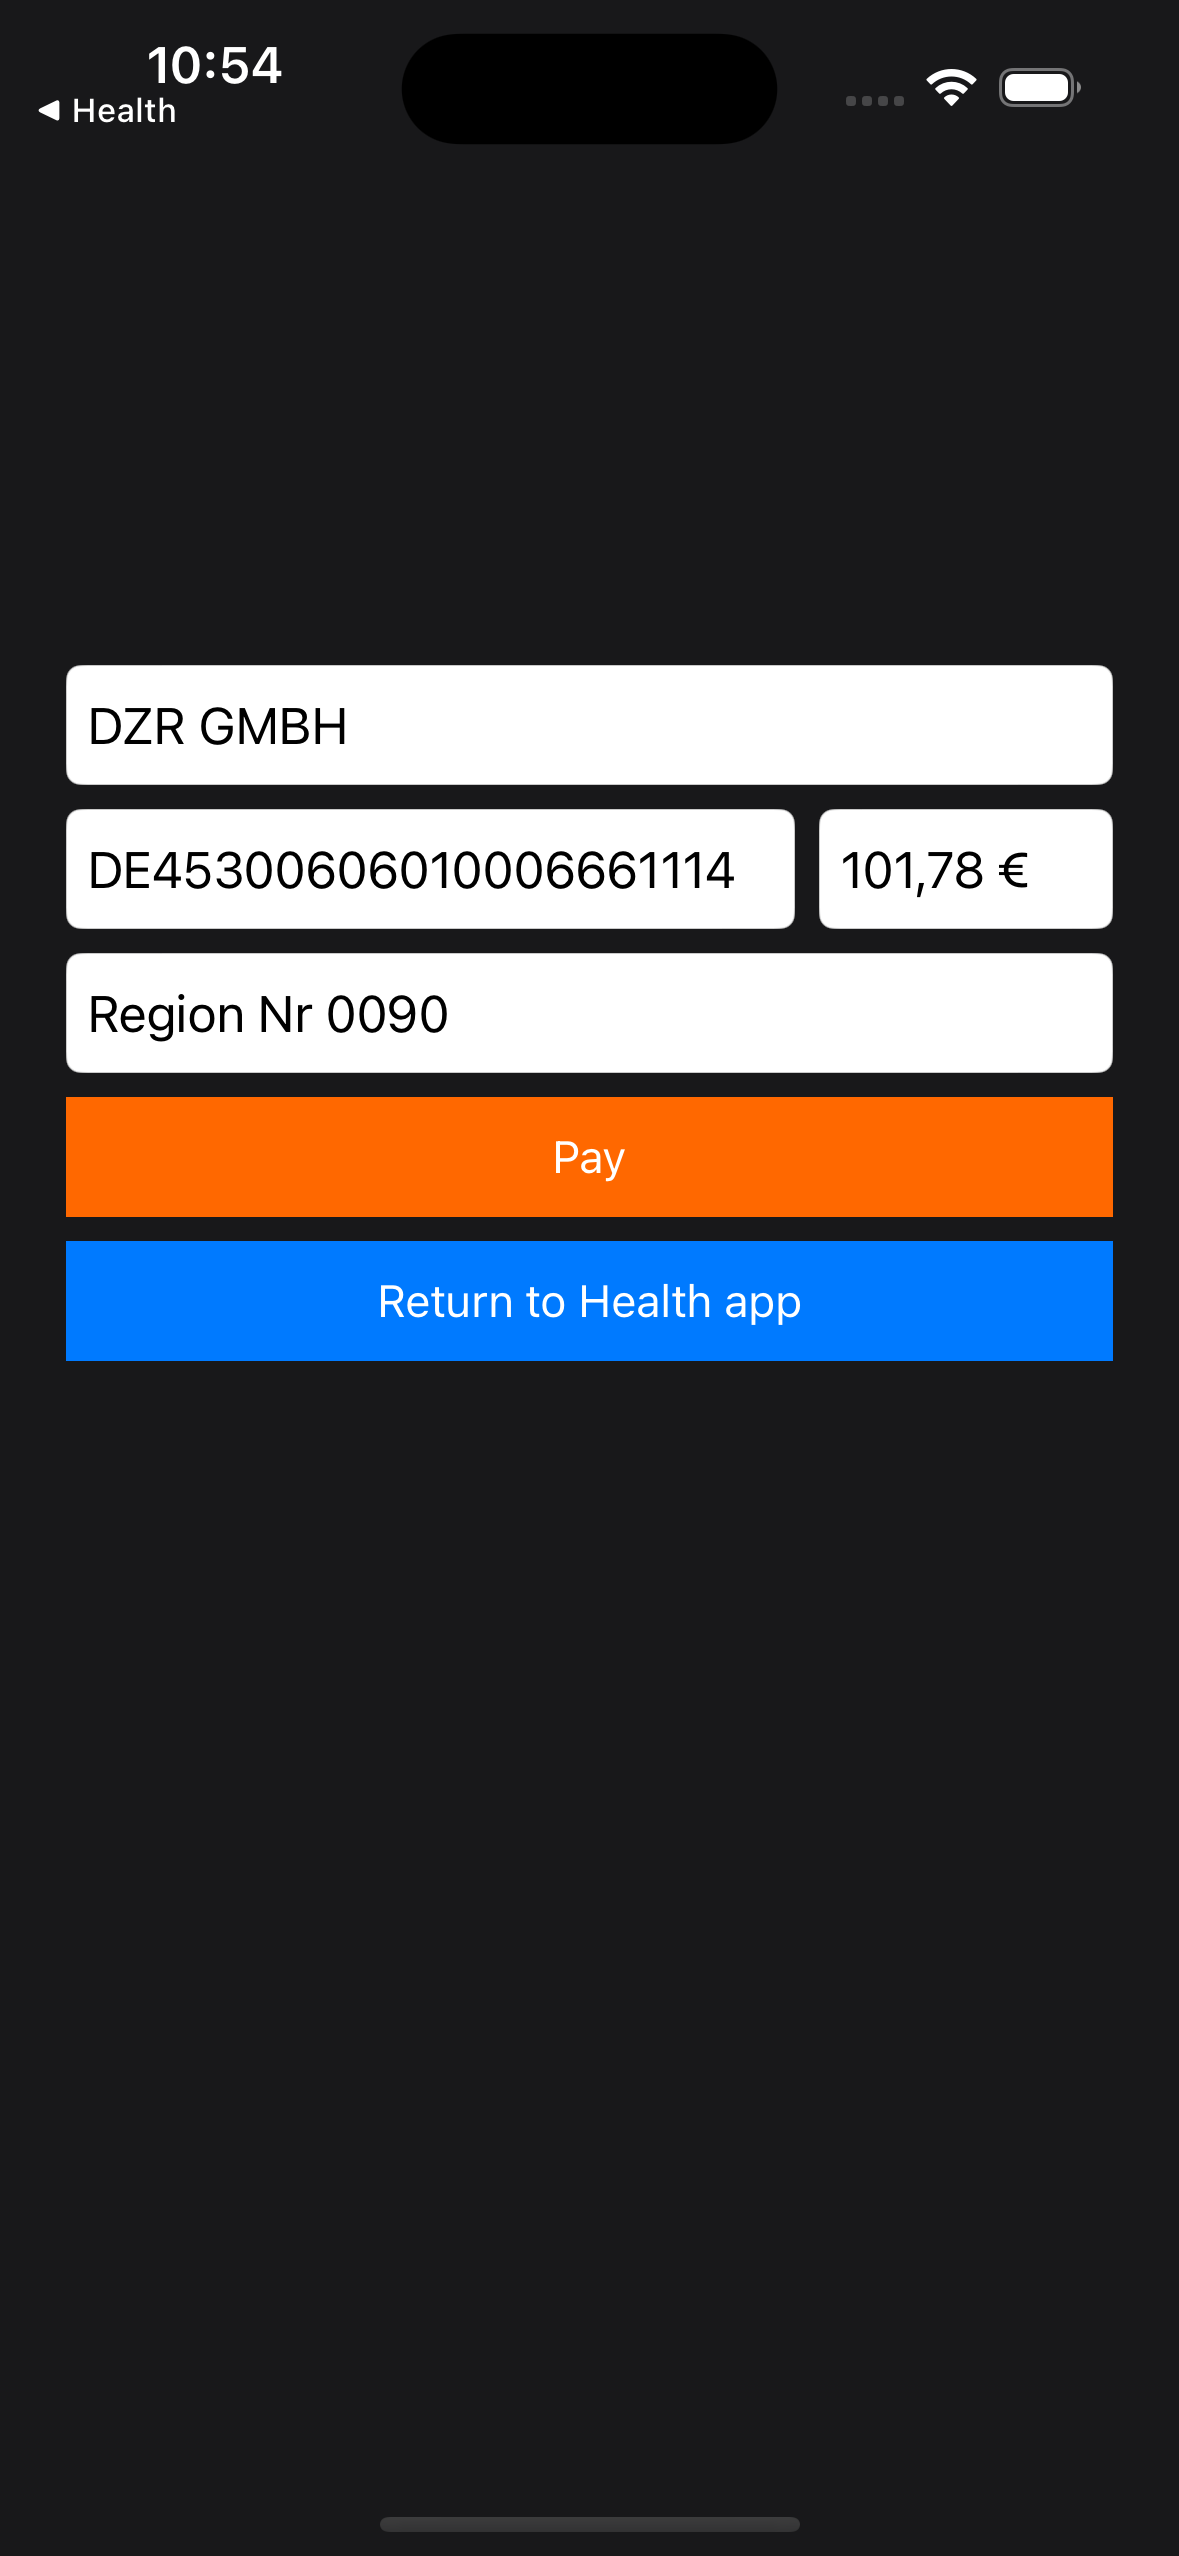
You should be redirected to the example banking app where the final extractions are shown:
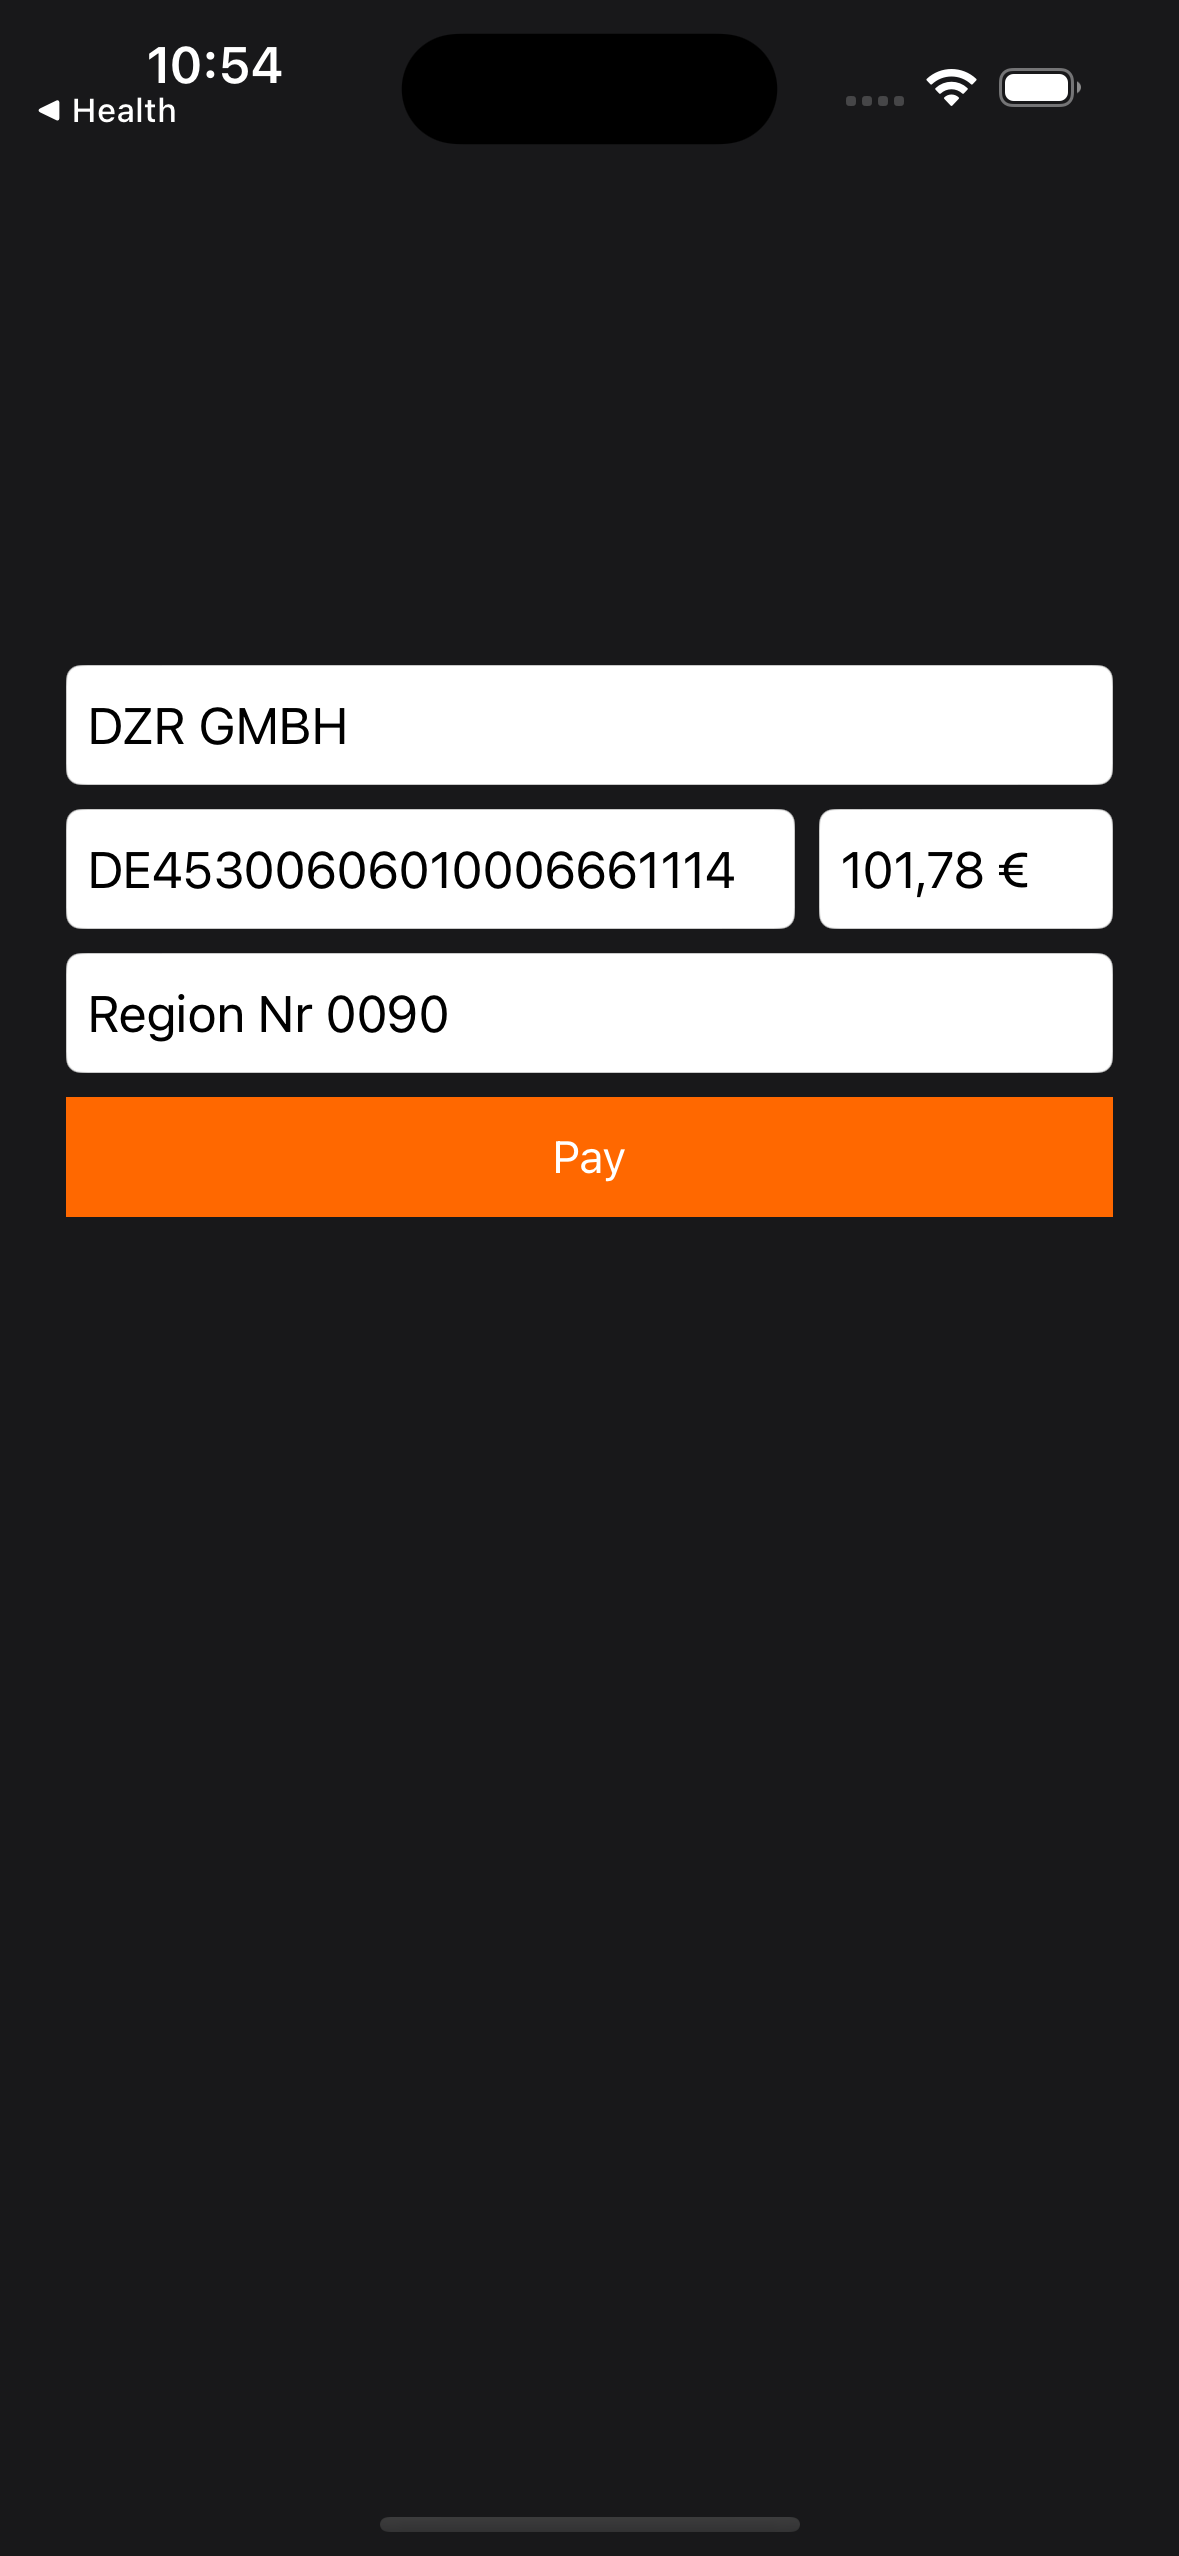
After you press the Pay button the Gini Bank SDK resolves the payment and allows you to return to your app:
Return to your app
After the test payment has been executed, the example banking app should show a “Return to Health app” button which should take you back to your app.
For handling incoming url in your app after redirecting back from the banking app you need to implement to handle the incoming url:
The following is an example for the url gini-pay://payment-requester:
    func application(_ app: UIApplication,
                     open url: URL,
                     options: [UIApplication.OpenURLOptionsKey: Any] = [:]) -> Bool {
        if url.host == "payment-requester" {
            processBankUrl(url: url)
            // hadle incoming url from the banking app
        }
        return true
    }
Here you can obtain the paymentRequestId and check the payment status:
func processBankUrl(url: URL) {
    guard let components = URLComponents(url: url, resolvingAgainstBaseURL: true) else { return }
    if let queryItems = components.queryItems {
        if let paymentRequestId = queryItems.first(where: { $0.name == "paymentRequestId" })?.value {
            health.getPaymentRequest(by: paymentRequestId) { [weak self] result in
                switch result {
                case .success(let paymentRequest):
                    print("paymentStatus: \(PaymentStatus(rawValue: paymentRequest.status))")
                case .failure(let error):
                    print("Failed to retrieve payment request: \(error.localizedDescription)")
                }
            }
        }
    }
}
With these steps completed you have verified that your app, the Gini Health API, the Gini Health SDK and the Gini Bank SDK work together correctly.
Testing in production
The steps are the same but instead of the development client credentials you will need to use production client credentials. This will make sure the Gini Health SDK receives real payment providers which open real banking apps.
You will also need to install a banking app which uses the Gini Bank SDK. Please contact us in case you don’t know which banking app(s) to install.
Lastly make sure that for production you register the scheme we provided you for deep linking and you are not using
gini-pay://payment-requester.